| 일 | 월 | 화 | 수 | 목 | 금 | 토 |
|---|---|---|---|---|---|---|
| 1 | 2 | 3 | 4 | 5 | 6 | 7 |
| 8 | 9 | 10 | 11 | 12 | 13 | 14 |
| 15 | 16 | 17 | 18 | 19 | 20 | 21 |
| 22 | 23 | 24 | 25 | 26 | 27 | 28 |
- eBPF
- opensearch
- 카오스 엔지니어링
- Model Serving
- Kubernetes 인증
- kubernetes operator
- Kubeflow
- Kubernetes
- CANARY
- opentelemetry
- CI/CD
- xdp
- tekton
- gitops
- Continuous Deployment
- 오퍼레이터
- Kopf
- knative
- Litmus
- argocd
- operator
- Argo
- mlops
- nginx ingress
- MLflow
- keda
- Pulumi
- seldon core
- serving
- blue/green
- Today
- Total
Kubernetes 이야기
OAuth2 Proxy와 Keycloak 연동 본문

OAuth2 Proxy는 인증 공급자(Google, GitHub 등)를 사용하여 계정을 검증하는 역방향 프록시 인증 서버이다.
최근 MSA 아키텍처의 Application 개발이 늘어나는 추세이다. 수많은 서비스 각각에 인증을 구현하는 것은 비효율적이고 어려운 문제이기 때문에 이러한 인증 Proxy가 필요하게 된다. 큰 시스템인 경우에는 API Gateway에서 인증을 수행하는 것이 일반적이다.
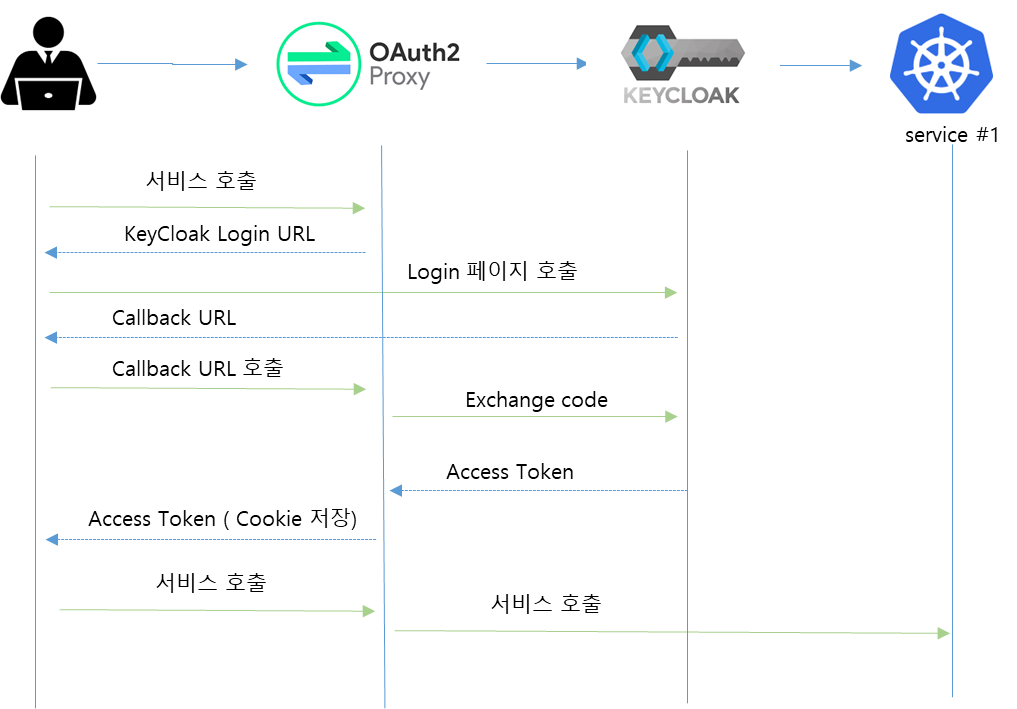
대략적인 흐름도는 다음과 같다.

설치
다음의 manifest를 설치한다.
apiVersion: apps/v1
kind: Deployment
metadata:
  labels:
    k8s-app: oauth2-proxy
  name: oauth2-proxy
  namespace: test
spec:
  replicas: 1
  selector:
    matchLabels:
      k8s-app: oauth2-proxy
  template:
    metadata:
      labels:
        k8s-app: oauth2-proxy
    spec:
      containers:
      - args:
        - --skip-provider-button=true
        - --ssl-insecure-skip-verify
        - --provider=keycloak-oidc
        - --upstream=file:///dev/null
        - --oidc-issuer-url=http://10.0.0.2:32730/auth/realms/test # keycloak 주소
        - --redirect-url=http://10.0.0.2:30878/oauth2/callback
        - --http-address=0.0.0.0:4180
        - --email-domain=*
        - --cookie-secure=false
        - --insecure-oidc-allow-unverified-email=true
        env:
        - name: OAUTH2_PROXY_CLIENT_ID
          value: test
        - name: OAUTH2_PROXY_CLIENT_SECRET
          value: xxxxx
        - name: OAUTH2_PROXY_COOKIE_SECRET
          value: FApM8bW-JK_a0y0DLm45miuvohvAFl6X8b7NZt9AQz8=
        image: quay.io/oauth2-proxy/oauth2-proxy:v7.4.0
        imagePullPolicy: Always
        name: oauth2-proxy
        ports:
        - containerPort: 4180
          protocol: TCP

---

apiVersion: v1
kind: Service
metadata:
  labels:
    k8s-app: oauth2-proxy
  name: oauth2-proxy
  namespace: test
spec:
  ports:
  - name: http
    port: 4180
    protocol: TCP
    targetPort: 4180
  selector:
    k8s-app: oauth2-proxy
cookieSecret를 다음과 같이 키를 생성한다.
python -c 'import os,base64; print(base64.urlsafe_b64encode(os.urandom(32)).decode())'
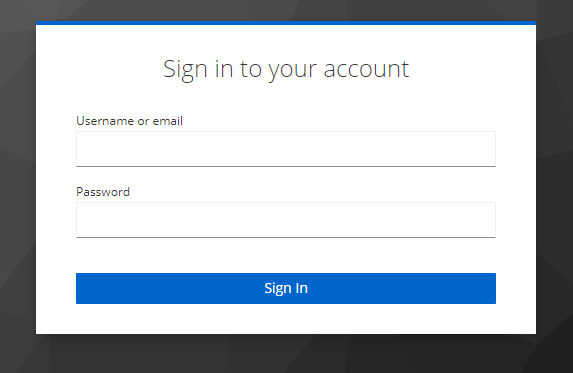
서비스 호출

[주의사항]
로그인 후 에러가 발생하는 경우 로그를 참고해야 한다. 이 중 아래의 로그에러에 대한 처리방안을 소개한다.
KeyCloak 19.x 버전부터는 audience mapper 설정하는 방법이 틀려졌다. 설정이 없는 경우 아래의 오류가 발생한다.
[oauthproxy.go:830] Error creating session during OAuth2 callback: audience from claim aud with value [account] does not match with any of allowed audiences map[vital:{}]
이슈 : https://github.com/oauth2-proxy/oauth2-proxy/issues/1931
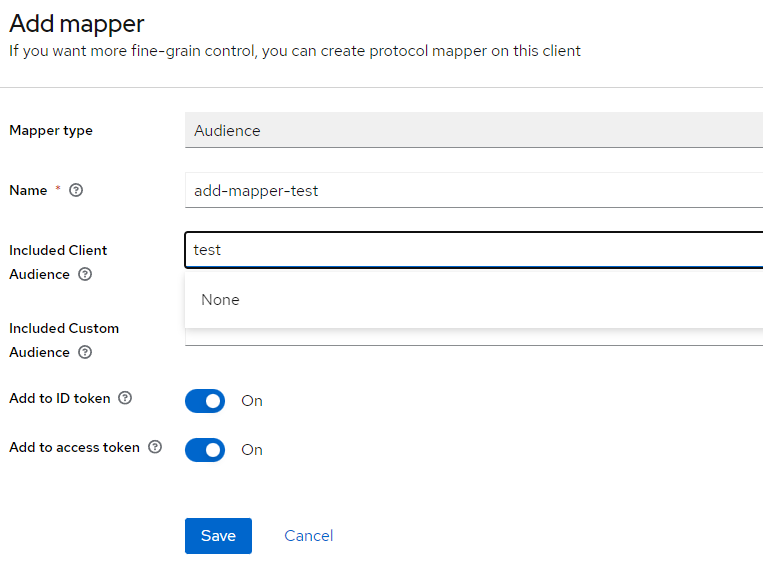
Keycloak 에서 Client의 정보에 아래와 같이 audience mapper를 추가해야 한다.

1. 상단메뉴에서 <client-id>-dedicated 를 선택한다.
2. [Add Mapper] 버튼을 클릭한 후 "By Configuartion" 을 선택한다.
3. 다음의 창에서 Audience를 선택하다.

4. 다음의 mapper정보를 추가 후 저장한다. (Included Client Audience는 본인의 Client ID를 선택한다.)

이제 OAuth2-proxy 앞에 nginx를 설치해 보자.
우선 nginx에 필요한 conf 파일을 다음과 같이 생성한다.
server {
  listen 80;
  server_name ...;
  include ssl/ssl.conf;

  location /oauth2/ {
    proxy_pass       http://127.0.0.1:4180;
    proxy_set_header Host                    $host;
    proxy_set_header X-Real-IP               $remote_addr;
    proxy_set_header X-Scheme                $scheme;
    proxy_set_header X-Auth-Request-Redirect $request_uri;
    # or, if you are handling multiple domains:
    # proxy_set_header X-Auth-Request-Redirect $scheme://$host$request_uri;
  }
  location = /oauth2/auth {
    proxy_pass       http://127.0.0.1:4180;
    proxy_set_header Host             $host;
    proxy_set_header X-Real-IP        $remote_addr;
    proxy_set_header X-Scheme         $scheme;
    # nginx auth_request includes headers but not body
    proxy_set_header Content-Length   "";
    proxy_pass_request_body           off;
  }

  location / {
    auth_request /oauth2/auth;
    error_page 401 = /oauth2/sign_in;

    # pass information via X-User and X-Email headers to backend,
    # requires running with --set-xauthrequest flag
    auth_request_set $user   $upstream_http_x_auth_request_user;
    auth_request_set $email  $upstream_http_x_auth_request_email;
    proxy_set_header X-User  $user;
    proxy_set_header X-Email $email;

    # if you enabled --pass-access-token, this will pass the token to the backend
    auth_request_set $token  $upstream_http_x_auth_request_access_token;
    proxy_set_header X-Access-Token $token;

    # if you enabled --cookie-refresh, this is needed for it to work with auth_request
    auth_request_set $auth_cookie $upstream_http_set_cookie;
    add_header Set-Cookie $auth_cookie;

    # When using the --set-authorization-header flag, some provider's cookies can exceed the 4kb
    # limit and so the OAuth2 Proxy splits these into multiple parts.
    # Nginx normally only copies the first `Set-Cookie` header from the auth_request to the response,
    # so if your cookies are larger than 4kb, you will need to extract additional cookies manually.
    auth_request_set $auth_cookie_name_upstream_1 $upstream_cookie_auth_cookie_name_1;

    # Extract the Cookie attributes from the first Set-Cookie header and append them
    # to the second part ($upstream_cookie_* variables only contain the raw cookie content)
    if ($auth_cookie ~* "(; .*)") {
        set $auth_cookie_name_0 $auth_cookie;
        set $auth_cookie_name_1 "auth_cookie_name_1=$auth_cookie_name_upstream_1$1";
    }

    # Send both Set-Cookie headers now if there was a second part
    if ($auth_cookie_name_upstream_1) {
        add_header Set-Cookie $auth_cookie_name_0;
        add_header Set-Cookie $auth_cookie_name_1;
    }

    proxy_pass http://backend/;
    # or "root /path/to/site;" or "fastcgi_pass ..." etc
  }
}
위의 nginx.conf 파일을 이용해 configmap을 생성한다.
k create cm -n keycloak nginx-conf --from-file=nginx.conf=nginx.conf
이제 nginx pod를 생성해 보자.
apiVersion: apps/v1
kind: Deployment
metadata:
  name: nginx
  namespace: keycloak
spec:
  selector:
    matchLabels:
      app: nginx
  replicas: 1
  template:
    metadata:
      labels:
        app: nginx
    spec:
      containers:
      - name: nginx
        image: nginx
        ports:
        - containerPort: 80
        volumeMounts:
        - mountPath: /etc/nginx/nginx.conf
          name: config
          readOnly: true
          subPath: nginx.conf
      volumes:
      - configMap:
          name: nginx-conf
          items:
            - key: nginx.conf
              path: nginx.conf
        name: config

---
apiVersion: v1
kind: Service
metadata:
  name: nginx
  namespace: keycloak
spec:
  type: NodePort
  ports:
  - port: 80
    targetPort: 80
  selector:
    app: nginx
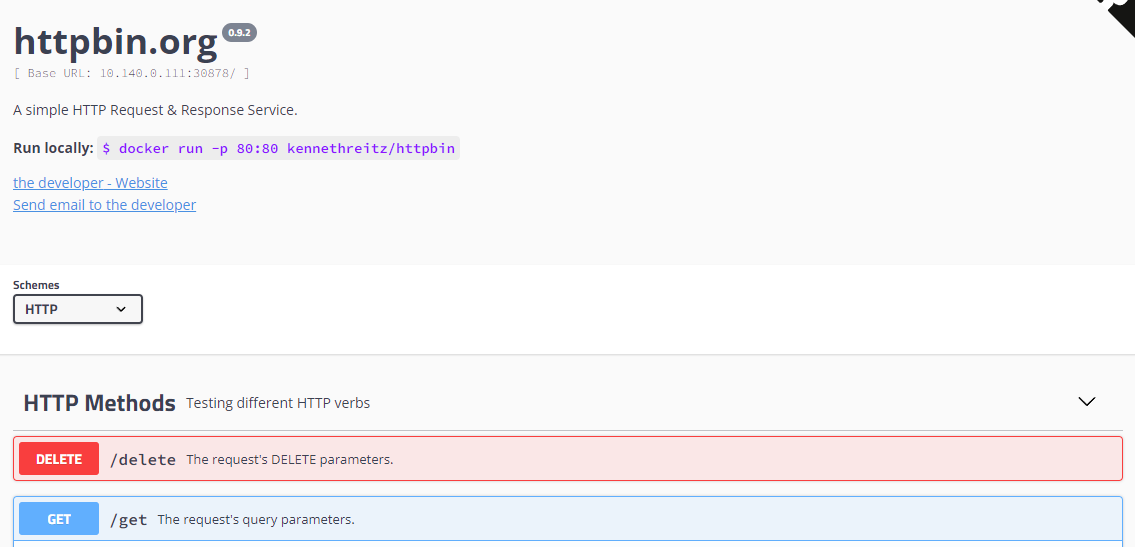
이제 nginx 접근 후 keycloak 로그인에 성공하면 다음과 같이 proxy 되는 것을 확인할 수 있다.

현재 버전에서는 token refresh 에 대한 이슈가 존재한다. cookie_refresh와 refresh token 시간과 문제가 발생하여 access token이 만료되는 현상이 발생한다.
https://github.com/oauth2-proxy/oauth2-proxy/issues/1836
'Kubernetes > 일반' 카테고리의 다른 글
| Kubernetes Gateway API (0) | 2023.12.10 |
|---|---|
| Dex와 OIDC 인증 (0) | 2023.02.13 |
| Chaos Mesh 에서 Physical Machines 카오스 엔지니어링 (0) | 2023.02.08 |
| KubeVela (0) | 2023.01.26 |
| Impersonation (Kubernetes Authentication) (0) | 2023.01.26 |


