| 일 | 월 | 화 | 수 | 목 | 금 | 토 |
|---|---|---|---|---|---|---|
| 1 | 2 | 3 | 4 | 5 | 6 | 7 |
| 8 | 9 | 10 | 11 | 12 | 13 | 14 |
| 15 | 16 | 17 | 18 | 19 | 20 | 21 |
| 22 | 23 | 24 | 25 | 26 | 27 | 28 |
- gitops
- tekton
- knative
- Argo
- Kubernetes
- Kubernetes 인증
- Continuous Deployment
- 오퍼레이터
- xdp
- opensearch
- argocd
- eBPF
- kubernetes operator
- keda
- seldon core
- mlops
- Model Serving
- operator
- 카오스 엔지니어링
- opentelemetry
- CANARY
- nginx ingress
- serving
- Kopf
- Litmus
- blue/green
- CI/CD
- MLflow
- Kubeflow
- Pulumi
- Today
- Total
Kubernetes 이야기
Kubernetes의 Replica를 0으로 확장 (KEDA) 본문
Kubernetes를 테스트 또는 운영 Cluster를 사용하다보면 replicas를 0으로 세팅하고자 하는 경우가 발생한다.
운영기는 인프라의 비용을 감소시키기 위해서 필요할 수 있고, 테스트 클러스터는 테스트 후 불필요하게 실행중인 Pod를 감소시키기 위해서 필요할 수 있다.
Kubernetes의 HPA를 사용할 수 있다고 생각할 수 있으나 HPA는 최소값을 0으로 할 수 없다.
그래서, 운영중인 kubernetes 의 replica를 0으로 세팅하기 위해서는 보통 Serverless (KNative, OpenFaas 등) 를 사용한다.
1. KNative

https://kmaster.tistory.com/4?category=923163
Knative Serving example
sample code # git clone https://github.com/knative/docs.git knative-docs Cloning into 'knative-docs'... remote: Enumerating objects: 37515, done. remote: Counting objects: 100% (587/587), done. remo..
kmaster.tistory.com
KNatvie에서는 Knative Pod Autoscaler(KPA)라는 자체 스케일 기능을 가지고 있다. Knative Serving는 앱의 replica를 축소할 수 있다.
apiVersion: v1
kind: ConfigMap
metadata:
 name: config-autoscaler
 namespace: knative-serving
data:
 enable-scale-to-zero: "true" # 기본 True
2. KEDA

KEDA 는 쿠버네티스기반 이벤트 기반 자동 스케일러. KEDA를 사용하면 처리해야 하는 이벤트 수를 기반으로 Kubernetes의 모든 컨테이너를 확장할 수 있다.
KEDA 는 KNatvie와 달리 Horizontal Pod Autoscaler (HPA) 와 같은 표준 Kubernetes 구성 요소와 함께 작동한다.
KEDA는 다양한 이벤트를 기반으로 scale 처리를 한다고 했는데, 이번에는 대표적인 HTTP 기반 이벤트를 기반으로 자동 크기를 조정하는 방법을 테스트해보자.
우선 KEDA를 설치해보자.
설치
# helm repo add kedacore https://kedacore.github.io/charts
# helm repo update

# helm install keda kedacore/keda --namespace keda --create-namespace
NAME: keda
LAST DEPLOYED: Tue Apr 26 15:50:06 2022
NAMESPACE: keda
STATUS: deployed
REVISION: 1
TEST SUITE: None
설치된 내역을 확인해 보자.
# kubectl get all -n keda
NAME                                                   READY   STATUS    RESTARTS   AGE
pod/keda-operator-778cf49bcf-2q9wb                     1/1     Running   0          49s
pod/keda-operator-metrics-apiserver-5ccf7b74dd-vmpjg   1/1     Running   0          49s

NAME                                      TYPE        CLUSTER-IP   EXTERNAL-IP   PORT(S)          AGE
service/keda-operator-metrics-apiserver   ClusterIP   10.100.9.3   <none>        443/TCP,80/TCP   50s

NAME                                              READY   UP-TO-DATE   AVAILABLE   AGE
deployment.apps/keda-operator                     1/1     1            1           50s
deployment.apps/keda-operator-metrics-apiserver   1/1     1            1           50s

NAME                                                         DESIRED   CURRENT   READY   AGE
replicaset.apps/keda-operator-778cf49bcf                     1         1         1       50s
replicaset.apps/keda-operator-metrics-apiserver-5ccf7b74dd   1         1         1       50s
http add-on 설치
https://github.com/kedacore/http-add-on
GitHub - kedacore/http-add-on: Add-on for KEDA to scale HTTP workloads
Add-on for KEDA to scale HTTP workloads. Contribute to kedacore/http-add-on development by creating an account on GitHub.
github.com
"HTTP add-on은 현재 베타 버전이다. 아직 개발 및 테스트 중이므로 프로덕션 용도로 권장할 수 없다." 라고 github 에 등록되어 있는 상태이다.
# helm install http-add-on kedacore/keda-add-ons-http --namespace keda
NAME: http-add-on
LAST DEPLOYED: Tue Apr 26 16:01:14 2022
NAMESPACE: keda
STATUS: deployed
REVISION: 1
TEST SUITE: None
설치 시 --set watchNamespace=<target namespace> 옵션을 설정하면 네임스페이스 모드로 설치한다.
이제 설치가 완료되었다. 한번 테스트를 진행해 보자.
테스트
먼저 테스트할 deployment와 servcie를 배포해 보자.
apiVersion: apps/v1
kind: Deployment
metadata:
  name: sampleapp
spec:
  replicas: 1
  selector:
    matchLabels:
      app: sampleapp
  template:
    metadata:
      labels:
        app: sampleapp
    spec:
      containers:
      - name: sampleapp
        image: nginx
        ports:
        - containerPort: 80
        imagePullPolicy: Always
---
apiVersion: v1
kind: Service
metadata:
  name: sampleapp
spec:
  type: ClusterIP
  selector:
    app: sampleapp
  ports:
  - protocol: TCP
    port: 80
    targetPort: 80
그 다음, HTTPScaledObject를 생성한다.
kind: HTTPScaledObject
apiVersion: http.keda.sh/v1alpha1
metadata:
    name: sampleapp
spec:
    host: "sampleapp.10.20.200.121.nip.io"
    targetPendingRequests: 100
    scaleTargetRef:
        deployment: sampleapp
        service: sampleapp
        port: 80
    replicas:
        min: 0
max: 1- targetPendingRequests : 스케일링 할 때의 HTTP 요청 수 기준점. 예를 들어 이 필드를 100으로 설정하면 200개의 진행 중인 요청이 있는 것으로 확인되면 HTTP Addon이 앱을 확장한다.. 반면에 진행 중인 요청이 20개만 있는 것으로 확인되면 축소된다.
이렇게 생성하면 deployment로 실행중이던 sample app pod가 없어지게 된다.
이제 사용자 요청을 받을 수 있는 ingress를 만들어보자.
apiVersion: networking.k8s.io/v1
kind: Ingress
metadata:
  annotations:
    kubernetes.io/ingress.class: nginx
  name: ingress-sampleapp
  namespace: keda
spec:
  rules:
  - host: sampleapp.10.20.200.121.nip.io
    http:
      paths:
      - path: /
        pathType: Prefix
        backend:
          service:
            name: keda-add-ons-http-interceptor-proxy
            port:
              number: 8080
keda-add-ons-http-interceptor-proxy가 keda namespace에 있기 때문에 namespace를 keda에 배포한다.
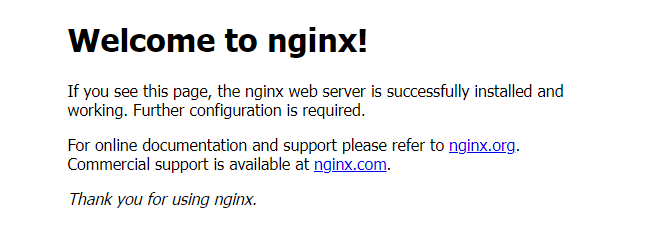
이제 브라우저에서 서비스를 호출하면 아래와 같은 화면이 나타난다.

호출할때 replica=1로 변경되면서 시간이 약간 소요된다.
Trigger를 이용한 Scale 방법
http-addon 설치를 하지 않고 nginx ingress의 호출통계를 사용하여 scale을 조정하는 방법도 있다.
apiVersion: keda.sh/v1alpha1
kind: ScaledObject
metadata:
  name: prometheus-scaledobject
  namespace: default
spec:
  scaleTargetRef:
    name: my-deployment
  triggers:
  - type: prometheus
    metadata:
      serverAddress: http://<prometheus-host>:9090
      metricName: http_requests_total
      threshold: '100'
      query: sum(rate(http_requests_total{deployment="my-deployment"}[2m]))
마무리
Replica를 "0"으로 설정하는 방법은 운영기에서는 신중히 고려해야 한다. 특히 기동 시 오래 걸리는 Java application의 경우에는 충분한 테스트를 거친 후 적용해야 한다. 하지만, 기동 문제가 없으면 운영기에서도 충분히 적용해 볼 만한 요소이다.
'Kubernetes > devops' 카테고리의 다른 글
| Argo Event (0) | 2022.05.03 |
|---|---|
| Keda와 Prometheus를 이용한 Scale in/out (0) | 2022.04.28 |
| OWASP ZAP 을 Kubernetes 환경에서 사용하기 (0) | 2022.04.02 |
| code-server로 개발하기 (0) | 2022.03.30 |
| Kubernetes에서 Gitea 사용하기 (0) | 2022.03.23 |


