
| 일 | 월 | 화 | 수 | 목 | 금 | 토 |
|---|---|---|---|---|---|---|
| 1 | 2 | 3 | 4 | |||
| 5 | 6 | 7 | 8 | 9 | 10 | 11 |
| 12 | 13 | 14 | 15 | 16 | 17 | 18 |
| 19 | 20 | 21 | 22 | 23 | 24 | 25 |
| 26 | 27 | 28 | 29 | 30 | 31 |
- tekton
- Litmus
- CANARY
- seldon core
- Continuous Deployment
- knative
- eBPF
- blue/green
- argocd
- MLflow
- CI/CD
- Kubernetes 인증
- Argo
- kubernetes operator
- keda
- Kubeflow
- opensearch
- opentelemetry
- mlops
- 카오스 엔지니어링
- Pulumi
- Kubernetes
- operator
- Model Serving
- nginx ingress
- xdp
- Kopf
- serving
- 오퍼레이터
- gitops
- Today
- Total
Kubernetes 이야기
Kafka를 사용하여 실시간 데이터 파이프라인 구축 본문

Apache Kafka는 방대한 양의 데이터를 처리, 저장 및 실시간 분석할 수 있는 분산 스트리밍 플랫폼이다. 기계학습 (ML)에서도 Apache Kafka와 연동한 예측 서비스로 많이 활용되는 플랫폼이다.
Kafka의 일반적인 사용 예
- 이벤트 소싱: 애플리케이션 상태에 대한 변경 사항을 일련의 이벤트로 캡처
- 스트림 처리: 실시간 분석 및 모니터링
- 데이터 레이크: 다양한 데이터 소스를 통합된 중앙 저장소에 통합
- Apache Spark 및 Hadoop과 같은 빅 데이터 도구와의 통합
Kafka가 ML에 사용되는 주요 예
- 실시간 데이터 파이프라인 : Kafka는 다양한 소스의 대량 실시간 데이터를 데이터 과학 및 기계 학습 모델로 스트리밍하는 방법을 제공한다. 이를 통해 지속적인 예측을 수행하고 실시간 데이터에 대한 패턴을 감지할 수 있다.
- 훈련 데이터 : Kafka를 통해 훈련 데이터를 스트리밍하면 기계 학습 모델이 새로운 사례를 통해 지속적으로 학습하여 최신 상태를 유지할 수 있다. 최근 축적된 데이터를 활용하여 모델을 주기적으로 재교육할 수 있다.
- 기능 엔지니어링 : Kafka 스트림은 모델 교육을 위해 의미 있는 기능을 추출하는 데이터에 대한 집계 또는 기타 변환을 계산하는 데 사용할 수 있다. 예를 들어 원시 데이터 포인트에서 일일 평균을 계산
- 실험 : Kafka를 통해 새로운 모델 변형 및 구성을 스트리밍하고 라이브 데이터 흐름에서 성능을 평가함으로써 기계 학습 실험을 빠르게 반복할 수 있다.
- 모델 배포 : Kafka는 실시간 요청을 예측하고 결과를 다운스트림 애플리케이션에 출력하는 ML 모델을 배포하기 위한 아키텍처를 제공한다.
- 로그 분석 : Kafka 스트림을 통해 데이터 센터 로그, 애플리케이션 로그 및 기타 로그 데이터 파이핑에 기계 학습을 적용하여 이를 분석하고 통찰력을 추출할 수 있다.
- 경고 : Kafka를 사용하면 라이브 데이터 스트림에서 이상치, 이상값, 패턴을 감지하고 경고를 트리거하여 중요한 이벤트나 문제를 표면화할 수 있다.
ML에서 Kafka를 활용하는 예제
쇼핑몰 웹사이트에서 고객이 방문, 제품조회, 구매 등 활동하는 내용을 저장 및 분석 후 추천 시스템이나 이상징후 등에서 활용하는 예제를 살펴보자.
시나리오

준비
가) Kafka 설치
https://kmaster.tistory.com/175
Strimzi로 Kubernetes에 Apache Kafka 설치
Strimzi는 다양한 배포 구성으로 Kubernetes에서 Apache Kafka 클러스터를 실행하는 프로세스를 단순화 할 수 있다. 개발을 위해서는 몇 분 안에 Minikube에 클러스터를 쉽게 설정할 수 있고, 프로덕션의 경
kmaster.tistory.com
나) Postgresql
apiVersion: v1
kind: Secret
metadata:
  name: postgres-sec
type: Opaque
data:
  POSTGRES_USER: dGVzdA==
  POSTGRES_PASSWORD: dGVzdA==
---
apiVersion: apps/v1
kind: StatefulSet
metadata:
  labels:
    app: postgres
  name: postgres
spec:
  replicas: 1
  revisionHistoryLimit: 10
  selector:
    matchLabels:
      app: postgres
  serviceName: postgres-svc
  template:
    metadata:
      labels:
        app: postgres
    spec:
      containers:
      - env:
        - name: PGDATA
          value: /var/lib/postgresql/data/pgdata
        - name: POSTGRES_USER
          valueFrom:
            secretKeyRef:
              key: POSTGRES_USER
              name: postgres-sec
        - name: POSTGRES_PASSWORD
          valueFrom:
            secretKeyRef:
              key: POSTGRES_PASSWORD
              name: postgres-sec
        - name: POSTGRES_DB
          value: test
        image: postgres:12.4-alpine
        imagePullPolicy: IfNotPresent
        name: postgres
        ports:
        - containerPort: 5432
          protocol: TCP
        volumeMounts:
        - mountPath: /var/lib/postgresql/data
          name: postgres-pvc
  volumeClaimTemplates:
  - apiVersion: v1
    kind: PersistentVolumeClaim
    metadata:
      name: postgres-pvc
      labels:
        app: postgres
    spec:
      accessModes:
      - ReadWriteOnce
      resources:
        requests:
          storage: 10Gi
      storageClassName: nfs-storage
---
apiVersion: v1
kind: Service
metadata:
  name: mlflow-postgres
spec:
  ports:
  - port: 5432
  selector:
    app: postgres
다) Jupyterhub
# helm download
wget https://get.helm.sh/helm-v3.13.2-linux-amd64.tar.gz

# helm repo add
helm repo add jupyterhub https://jupyterhub.github.io/helm-chart/
helm repo update

# helm install
helm upgrade --cleanup-on-fail \
  --install jupyterhub jupyterhub/jupyterhub

Jupyterhub의 상세 옵션은 다음을 참고한다.
https://z2jh.jupyter.org/en/stable/jupyterhub/customization.html
Customization Guide
JupyterHub can be configured and customized to fit a variety of deployment requirements. If you would like to expand JupyterHub, customize its setup, increase the computational resources available ...
z2jh.jupyter.org
Notebook에 필요한 패키지
pip install kafka-python
pip install psycopg2-binary
pip install pandas
pip install seaborn
pip install scikit-learn
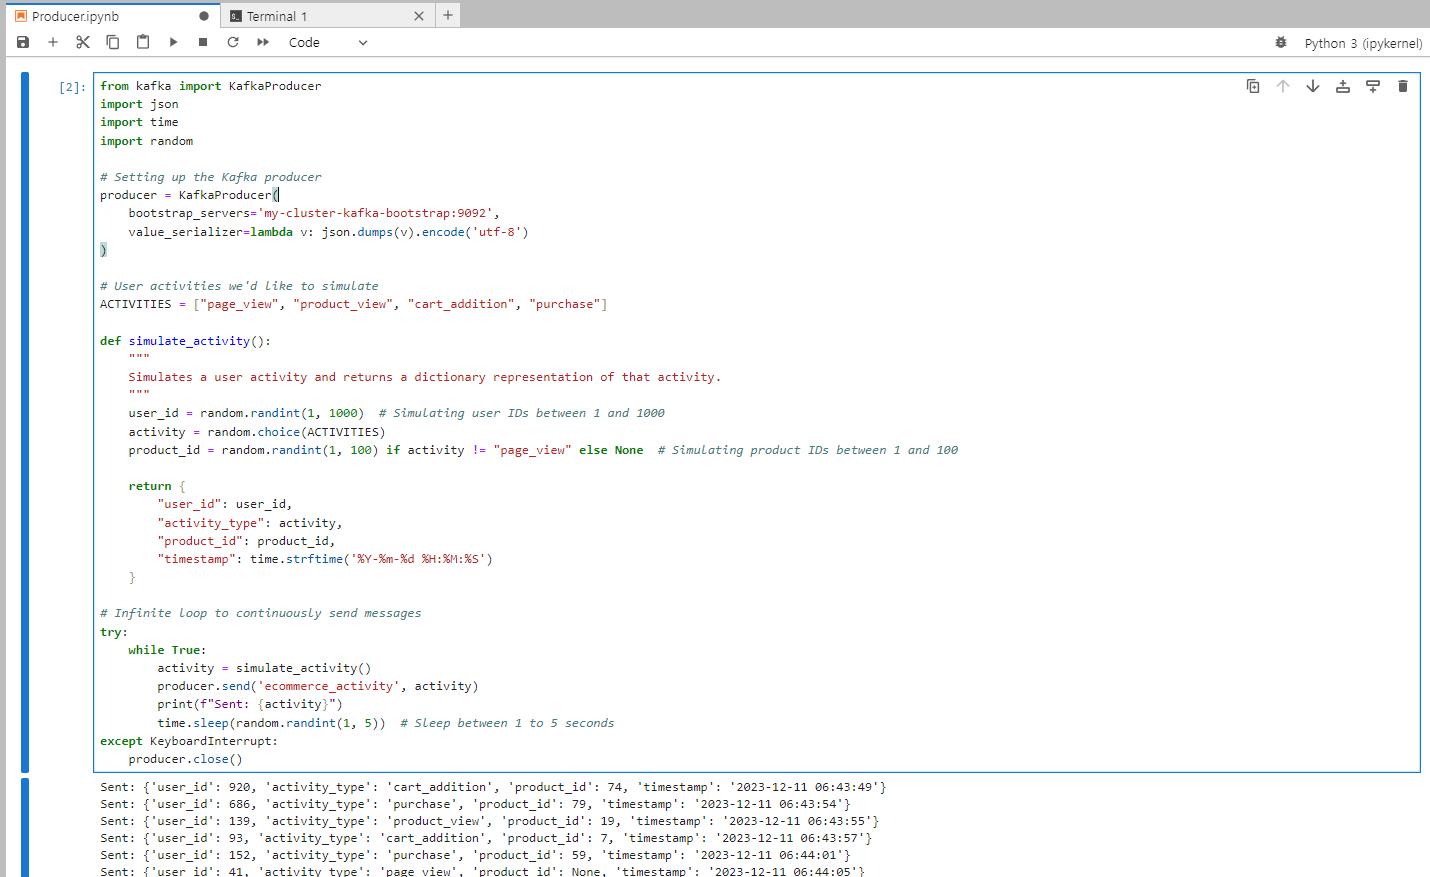
1) Producer
from kafka import KafkaProducer
import json
import time
import random

# Setting up the Kafka producer
producer = KafkaProducer(
    bootstrap_servers='my-cluster-kafka-bootstrap:9092',
    value_serializer=lambda v: json.dumps(v).encode('utf-8')
)

# User activities we'd like to simulate
ACTIVITIES = ["page_view", "product_view", "cart_addition", "purchase"]

def simulate_activity():
    """
    Simulates a user activity and returns a dictionary representation of that activity.
    """
    user_id = random.randint(1, 1000)  # Simulating user IDs between 1 and 1000
    activity = random.choice(ACTIVITIES)
    product_id = random.randint(1, 100) if activity != "page_view" else None  # Simulating product IDs between 1 and 100

    return {
        "user_id": user_id,
        "activity_type": activity,
        "product_id": product_id,
        "timestamp": time.strftime('%Y-%m-%d %H:%M:%S')
    }

# Infinite loop to continuously send messages
try:
    while True:
        activity = simulate_activity()
        producer.send('ecommerce_activity', activity)
        print(f"Sent: {activity}")
        time.sleep(random.randint(1, 5))  # Sleep between 1 to 5 seconds
except KeyboardInterrupt:
    producer.close()
[실행]
2) Consumer
사전에 Database setup이 필요하다.
$ psql -U test
$ CREATE DATABASE ecommerce_db;
$ \c ecommerce_db
$ CREATE TABLE activity_log (     id SERIAL PRIMARY KEY,     user_id INT NOT NULL,     activity_type VARCHAR(255) NOT NULL,     product_id INT,     timestamp TIMESTAMP DEFAULT CURRENT_TIMESTAMP );
다음은 Consumer 소스이다.
from kafka import KafkaConsumer
import json
import psycopg2

# Set up the Kafka Consumer
consumer = KafkaConsumer(
    'ecommerce_activity',
    bootstrap_servers='my-cluster-kafka-bootstrap:9092',
    auto_offset_reset='earliest',  # start at the beginning of the topic
    value_deserializer=lambda x: json.loads(x.decode('utf-8'))
)

# Establish connection to PostgreSQL
conn = psycopg2.connect(
    dbname='ecommerce_db',
    user='test',
    password='test',
    host='postgres',
    port='5432'
)
cursor = conn.cursor()

try:
    for message in consumer:
        # Parse message
        data = message.value

        # Insert data into PostgreSQL
        query = """
        INSERT INTO activity_log (user_id, activity_type, product_id, timestamp)
        VALUES (%s, %s, %s, %s);
        """
        cursor.execute(query, (data['user_id'], data['activity_type'], data['product_id'], data['timestamp']))

        # Commit changes
        conn.commit()

        print(f"Stored: {data}")

except KeyboardInterrupt:
    pass

finally:
    cursor.close()
    conn.close()

3) 분석
import psycopg2
import pandas as pd
import seaborn as sns

# Connect to the database
conn = psycopg2.connect(
    dbname='ecommerce_db',
    user='your_username',
    password='your_password',
    host='localhost',
    port='5432'
)

# Querying data into a DataFrame
query = "SELECT * FROM activity_log;"
df = pd.read_sql_query(query, conn)

# Activity Trends
activity_trends = df.groupby('timestamp').activity_type.value_counts().unstack().fillna(0)

activity_trends.plot(figsize=(15, 7))


# Most Viewed Products
most_viewed_products = df[df.activity_type == "product_view"].product_id.value_counts()

most_viewed_products.plot(kind='bar', figsize=(15, 7))

# Cart Abandonment Rate:
cart_additions = df[df.activity_type == "cart_addition"].shape[0]
purchases = df[df.activity_type == "purchase"].shape[0]

cart_abandonment_rate = (cart_additions - purchases) / cart_additions

print(f"Cart Abandonment Rate: {cart_abandonment_rate:.2%}")

# Example: Heatmap of user activity
activity_pivot = df.pivot_table(index='product_id', columns='activity_type', aggfunc='size', fill_value=0)
sns.heatmap(activity_pivot, annot=True, cmap="YlGnBu")


4) 상품추천
from sklearn.metrics.pairwise import cosine_similarity
import numpy as np

# Dummy product-feature matrix (Rows = Products, Columns = Features)
products = ['product_1', 'product_2', 'product_3', 'product_4', 'product_5']
features = np.array([
    [1, 0, 0, 1, 0],
    [0, 1, 0, 1, 0],
    [1, 1, 0, 0, 0],
    [0, 0, 1, 0, 1],
    [1, 0, 1, 0, 0]
])

# Compute similarity between products
product_similarity = cosine_similarity(features)

def recommend_products(product_id):
    product_idx = products.index(product_id)
    similar_products = product_similarity[product_idx]
    recommended = np.argsort(similar_products)[-3:-1]  # Take 2 most similar products
    return [products[i] for i in recommended]

# Let's say user viewed 'product_1'
recommendations = recommend_products('product_1')
print(recommendations)
설명
- 우리는 제품과 그 기능을 나타내는 더미 매트릭스를 만든다.
- scikit-learn을 사용하여 제품이 서로 얼마나 유사한지 계산한다.
- 사용자가 제품을 볼 때 가장 유사한 제품을 추천으로 가져온다.

5) 이상징후 탐지
import pandas as pd

def anomaly_detection(df, window=5, threshold=0.5):
    df['rolling_avg'] = df['activity_count'].rolling(window=window).mean()
    df['anomaly'] = df['activity_count'] < (df['rolling_avg'] * threshold)
    anomalies = df[df['anomaly']]
    return anomalies

# Dummy data
data = {
    'timestamp': pd.date_range(start='2022-01-01', periods=10, freq='D'),
    'activity_count': [100, 105, 102, 108, 110, 50, 55, 56, 58, 60]
}
df = pd.DataFrame(data)

anomalies = anomaly_detection(df)
if not anomalies.empty:
    print("Alert! Possible website issues detected!")
설명
- 우리는 활동 횟수의 이동 평균을 계산한다.
- 그런 다음 활동 수가 이동 평균(예: 예에서는 50%)보다 현저히 낮은 타임스탬프를 식별한다.
- 이러한 이상이 발견되면 경고가 발생한다.

참고
'Kubernetes > MLOps' 카테고리의 다른 글
| 온라인 서빙과 배치 서빙 (0) | 2024.05.06 |
|---|---|
| Ollama and Chainlit으로 Langchain과 RAG 구현하기 (0) | 2023.12.30 |
| MLflow Serving (0) | 2023.09.09 |
| mlflow (0) | 2023.09.09 |
| dvc (0) | 2023.09.08 |


