| 일 | 월 | 화 | 수 | 목 | 금 | 토 |
|---|---|---|---|---|---|---|
| 1 | 2 | 3 | 4 | 5 | 6 | 7 |
| 8 | 9 | 10 | 11 | 12 | 13 | 14 |
| 15 | 16 | 17 | 18 | 19 | 20 | 21 |
| 22 | 23 | 24 | 25 | 26 | 27 | 28 |
- Argo
- kubernetes operator
- CANARY
- operator
- gitops
- Kubernetes 인증
- Kubeflow
- seldon core
- Model Serving
- argocd
- Kubernetes
- xdp
- keda
- knative
- eBPF
- tekton
- 카오스 엔지니어링
- MLflow
- opensearch
- 오퍼레이터
- CI/CD
- Litmus
- Kopf
- opentelemetry
- blue/green
- nginx ingress
- mlops
- serving
- Continuous Deployment
- Pulumi
- Today
- Total
Kubernetes 이야기
Tekton을 이용한 CI/CD 본문

Tekton은 CI/CD 시스템 구축을 위한 클라우드 네이티브 솔루션으로 CI/CD 도구로는 Argo Workflow, Argo CD, Jenkins 와 많이 비교가 되고 있는 솔루션이다.
Tekton은 Pipeline, Catalog, Dashboard, CLI 등와 같은 지원 구성요소로 구성된다.
구성요소
- Tekton Pipelines : CI/CD 파이프라인을 만드는 역할을 하는 Kubernetes 사용자 지정 리소스 세트
- Tekton Catalog : 재사용 가능한 Task 및 파이프라인 리소스
- Tekton CLI (tkn) : Tekton 과 상호 작용할 수 있도록 Kubernetes CLI 위에 구축된 명령줄 인터페이스
- Tekton Dashboard : Kubernetes 클러스터에서 TektonCD 파이프라인 , 대시보드 , 트리거 를 설치, 업그레이드 및 관리할 수 있는 UI
- Tekton Triggers : 이벤트를 기반으로 파이프라인을 생성할 수 있다. 예를 들어 GitHub/GitLab 리포지토리에 대해 PR이 병합될 때마다 파이프라인의 실행을 트리거할 수 있다.
- Tekton Operator : Kubernetes 클러스터에서 Tekton 프로젝트를 설치, 업데이트 및 제거할 수있는 Kubernetes Operator 패턴
이러한 Pipeline을 실행려는 워크로드를 지정하는 개념에 Task, Pipeline, TaksRun, PipelineRun 이 있다.
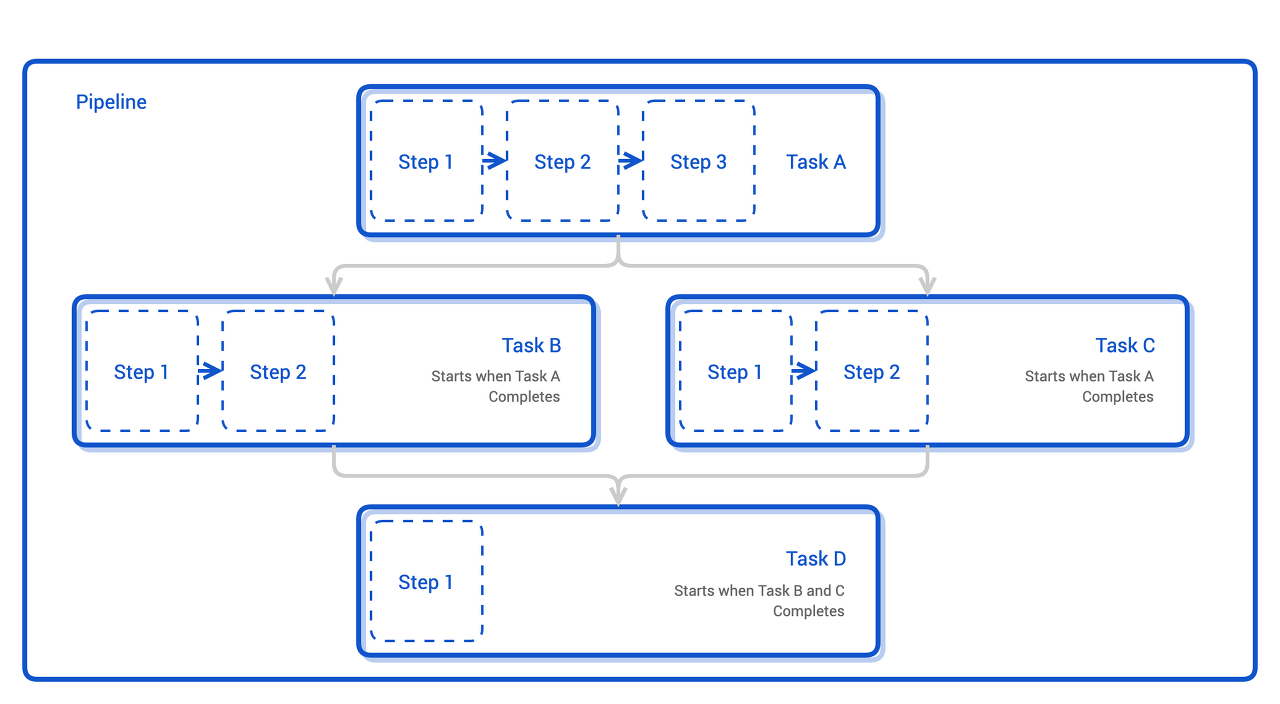
- Task : Tasks는 Pipeline 구성 블록이며, 순차적으로 실행되는 단계들로 구성된다. Task는 재사용이 가능하며 여러 Pipeline에서 사용할 수 있다.
- Pipeline : 파이프라인은 특정 실행 순서대로 정렬된 Task 리소스 컬렉션이다. 하나 이상의 작업이 포함된 파이프라인을 사용하여 애플리케이션에 대한 CI/CD 워크플로를 정의할 수 있다.
- TaskRun : TaskRun은 클러스터에서 특정 입력, 출력 및 실행 매개변수를 사용하여 실행할 Task를 인스턴스화한다. 자체로 또는 PipelineRun의 일부로 호출될 수 있다.
- PipelineRun : PipelineRun은 클러스터에서 특정 입력, 출력 및 실행 매개변수를 사용하여 실행할 Pipeline을 인스턴스화한다. PipelineRun의 각 Task에 해당하는 TaskRun이 자동으로 생성된다.
Step, Task, Pipeline 개념

TaskRun 및 PipelineRun 개념

전체적인 실행 구조는 다음과 같다.

Tekton 설치
pipeline 설치
# kubectl apply -f https://storage.googleapis.com/tekton-releases/pipeline/latest/release.yamlDashboard 설치
# kubectl apply --filename https://storage.googleapis.com/tekton-releases/dashboard/latest/tekton-dashboard-release.yaml설치가 정상적인지 모니터링 해보자.
# kubectl get pods --namespace tekton-pipelines --watch다음과 같이 3개의 pod가 running중이면 설치가 완료된 것이다.
tekton-dashboard-5ff9d6d968-cbtzp              1/1     Running   0          92s
tekton-pipelines-controller-868fb64ff5-nqg88   1/1     Running   0          3m19s
tekton-pipelines-webhook-655c75cb44-5zvh4      1/1     Running   0          3m19s
대시보드 접속을 위한 port를 port-forward 해보자. ( NodePort 나 Ingress로 설정하여 접속할 수도 있다.)
kubectl port-forward svc/tekton-dashboard 9097:9097 -n tekton-pipelines
CI 예제
먼저 CI 과정에서 Git에서 소스를 clone 하는 Task를 만들어보자.
kubectl apply -f https://raw.githubusercontent.com/tektoncd/catalog/main/task/git-clone/0.7/git-clone.yaml -n test이제 git-clone task 의 파일 확인을 위해 debug task 를 생성해 보자.
apiVersion: tekton.dev/v1beta1
kind: Task
metadata:
  name: run-debug
spec:
  workspaces:
  - name: output
    optional: true
  steps:
  - image: alpine:latest
    workingDir: "/workspace/output/"
    script: |
      ls -lrt
다음으로, kaniko를 사용하여 git의 소스를 빌드하는 task를 만들어 보자.
apiVersion: tekton.dev/v1beta1
kind: Task
metadata:
  name: build-kaniko-git
spec:
  workspaces:
  - name: output
    optional: true
  params:
  - name: app_repo
  - name: container_image
  - name: container_tag
  volumes:
  - name: kaniko-secret
    secret:
      secretName: regcred
      items:
      - key: .dockerconfigjson
        path: config.json
  steps:
  - name: build
    image: gcr.io/kaniko-project/executor:debug
    workingDir: "/workspace/output/"
    command: [/kaniko/executor]
    args:
    - --context=./
    - --destination=$(params.container_image):$(params.container_tag)
    - --force
    - --skip-tls-verify
    volumeMounts:
    - name: kaniko-secret
      mountPath: /kaniko/.docker/
위의 docker registry secret는 아래와 같이 생성한다.
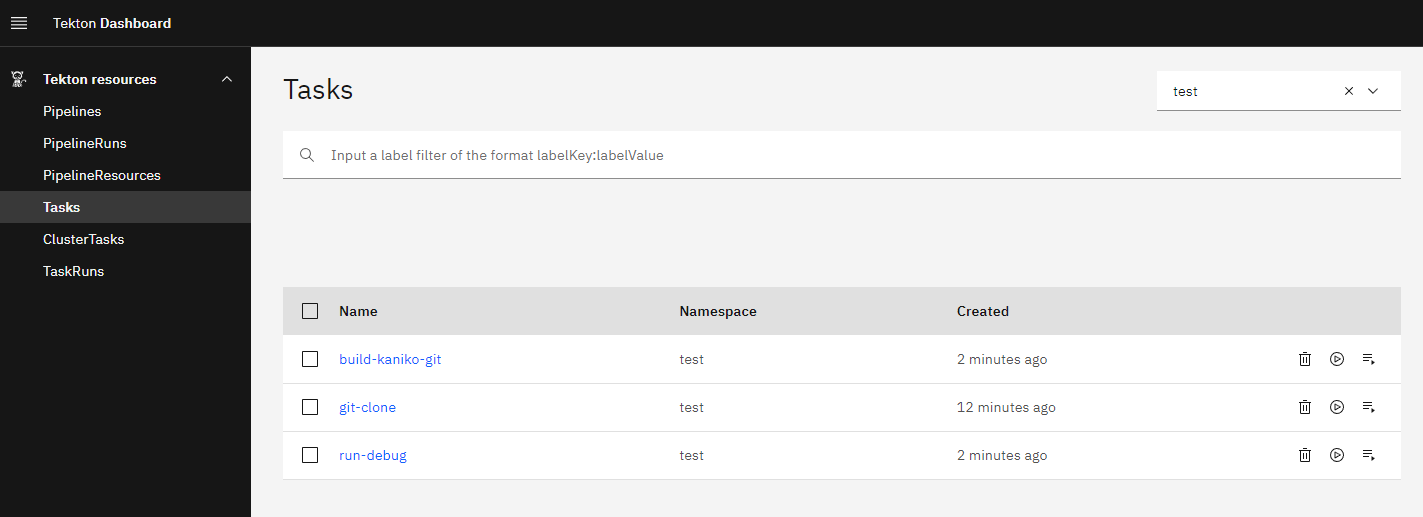
kubectl create secret docker-registry regcred --docker-username=username --docker-password=password --docker-email=email@address.com -n test현재까지 만든 Task는 다음과 같다.

이제 CI를 위한 Pipeline을 만들어 보자.
apiVersion: tekton.dev/v1beta1
kind: Pipeline
metadata:
  name: pipeline
spec:
  params:
    - name: gitrevision-tag
      description: |
            THIS PARAMETER COMING FROM TRIGGER TEMPLATE
  workspaces:
  - name: shared-data
    description: |
      This workspace will receive the cloned git repo and be passed
      to the next Task for the repo's README.md file to be read.
  tasks:
  - name: fetch-repo
    taskRef:
      name: git-clone
    params:
    - name: url
      value: https://github.com/kmaster8/flask-helloworld.git
    - name: revision
      value: $(params.gitrevision-tag)
    workspaces:
    - name: output
      workspace: shared-data
  - name: debug-folder
    runAfter: ["fetch-repo"]
    taskRef:
      name: run-debug
    workspaces:
    - name: output
      workspace: shared-data
  - name: build-container-image
    runAfter: ["debug-folder"]
    taskRef:
      name: build-kaniko-git
    params:
    - name: app_repo
      value: dir:///workspace/output/
    - name: container_image
      value: docker.io/kmaster8/example1
    - name: container_tag
      value: $(params.gitrevision-tag)
    workspaces:
    - name: output
      workspace: shared-data
마지막으로 Pipeline을 실행하기 위한 PipelineRun 을 만들어보자.
apiVersion: tekton.dev/v1beta1
kind: PipelineRun
metadata:
  generateName: pipelinerun-
spec:
  serviceAccountName: tekton-sa
  pipelineRef:
    name: pipeline
  params:
    - name: gitrevision-tag
      value: master
  workspaces:
  - name: shared-data
    volumeClaimTemplate:
      spec:
        accessModes:
        - ReadWriteOnce
        resources:
          requests:
            storage: 1Gi
pipeline에서 사용할 service account와 role/rolebinding은 다음과 같다.
apiVersion: v1
kind: ServiceAccount
metadata:
  name: tekton-sa
apiVersion: rbac.authorization.k8s.io/v1
kind: Role
metadata:
  name: tekton-pipeline-role
rules:
- apiGroups: ["extensions", "apps", ""]
  resources: ["services", "deployments", "pods","pvc","job"]
  verbs: ["get", "create", "update", "patch", "list", "delete"]
---
apiVersion: rbac.authorization.k8s.io/v1
kind: RoleBinding
metadata:
  name: tekton-pipeline-role-binding
roleRef:
  apiGroup: rbac.authorization.k8s.io
  kind: Role
  name: tekton-pipeline-role
subjects:
- kind: ServiceAccount
  name: tekton-sa
파이프라인을 실행한 결과는 다음과 같다.

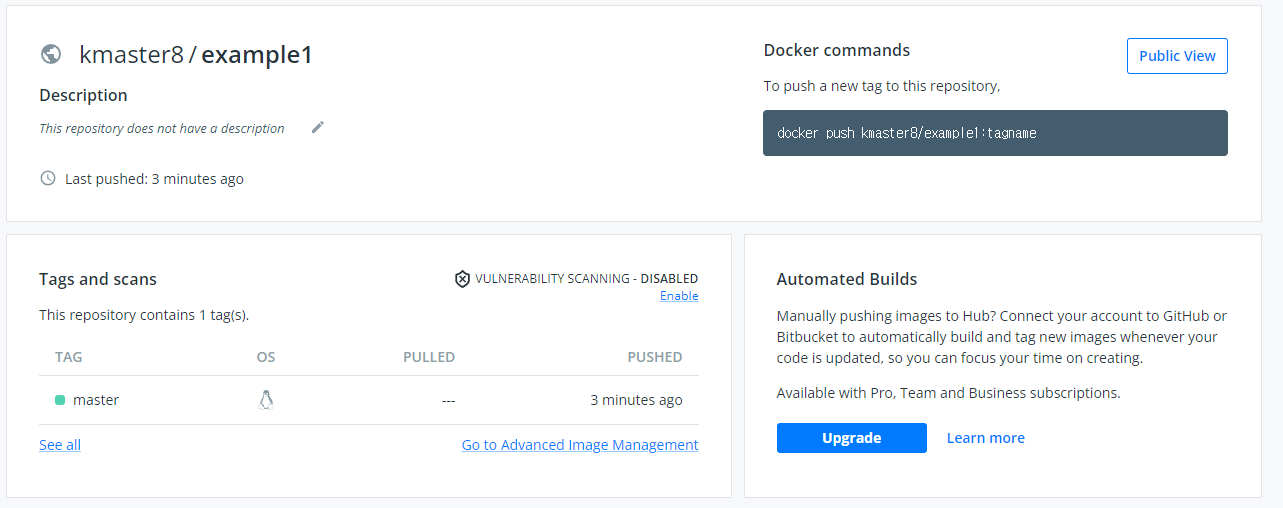
dockerhub 에도 정상적으로 push 되어 있음을 확인 할 수 있다.

CD 예제
CI 과정에 있었던 pipeline 에서 deploy관련된 CD Task를 추가해 보자.
apiVersion: tekton.dev/v1beta1
kind: Pipeline
metadata:
  name: pipeline
spec:
  params:
    - name: gitrevision-tag
      description: |
            THIS PARAMETER COMING FROM TRIGGER TEMPLATE
  workspaces:
  - name: shared-data
    description: |
      This workspace will receive the cloned git repo and be passed
      to the next Task for the repo's README.md file to be read.
  tasks:
  - name: fetch-repo
    taskRef:
      name: git-clone
    params:
    - name: url
      value: https://github.com/kmaster8/flask-helloworld.git
    - name: revision
      value: $(params.gitrevision-tag)
    workspaces:
    - name: output
      workspace: shared-data
  - name: debug-folder
    runAfter: ["fetch-repo"]
    taskRef:
      name: run-debug
    workspaces:
    - name: output
      workspace: shared-data
  - name: build-container-image
    runAfter: ["debug-folder"]
    taskRef:
      name: build-kaniko-git
    params:
    - name: app_repo
      value: dir:///workspace/output/
    - name: container_image
      value: docker.io/kmaster8/example1
    - name: container_tag
      value: $(params.gitrevision-tag)
    workspaces:
    - name: output
      workspace: shared-data
  - name: kubectl-deploy
    taskRef:
        kind: Task
        name: kubernetes-actions
    runAfter:
      - build-container-image
    params:
    - name: script
      value: |
        kubectl apply -f deploy.yaml
    workspaces:
      - name: manifest-dir
        workspace: shared-data
다시 pipelinerun을 실행하면 다음과 같이 배포가 완료됨을 볼 수 있다.

Tekton은 Tekton Hub ( https://hub.tekton.dev/ ) 에 많은 Task 템플릿들이 존재하기 때문에 사용자가 CI/CD 를 구성하기에 편리한 장점이 있다.
참고
'Kubernetes > devops' 카테고리의 다른 글
| DevSpace (0) | 2022.09.29 |
|---|---|
| Tekton Trigger (0) | 2022.09.14 |
| Jenkins와 Keycloak을 이용한 OIDC 연동 (0) | 2022.09.10 |
| jenkins 를 활용하여 Kubernetes에 이미지 배포 및 모니터링 (0) | 2022.09.08 |
| Nginx Ingress를 통해 Canary 배포 설정 (0) | 2022.09.04 |


